This is Niall Mackay, The Podcast Guy. I started podcasting as a hobby, so I didn’t invest much in the setup. Over the years, now I run a podcast studio with top-notch equipment. There are big differences between now and then. So, today I’ll tell you some of the lessons that I’ve learned about podcast equipment throughout my podcasting journey.
How I Got Started with Podcast Equipment
Back in 2019, I bought the Blue Yeti USB microphone. Everyone online seemed to recommend it. It was plug-and-play, no need for extra equipment, and it felt professional compared to using my laptop mic. I plugged it into my old 2010 MacBook Pro, opened GarageBand, and hit record.
That was my setup: one mic, one laptop, and free software.
The first few episodes sounded okay to me, but soon I noticed something strange. The mic picked up everything—the dog snoring, the ice clinking in my glass, even tiny background sounds. It drove me crazy when I went back to edit. At first, I thought I was doing something wrong. Later I realized it was the mic.
Why Condenser Mics Don’t Work for Podcasts
The Blue Yeti is a condenser microphone. I didn’t know the difference at the time. Condenser mics are designed for music studios. They capture every detail in a voice or instrument. That’s perfect if you’re singing in a soundproof booth. But for a podcast in a bedroom? It’s a nightmare.
The sensitivity of a condenser mic means it hears your voice and everything else in the room. Room echo, background hum, traffic, pets—you name it. As a beginner, I didn’t have the skills or tools to clean that up in editing.
So while blogs kept saying “buy the Blue Yeti,” I learned the hard way that it wasn’t the right choice.
Switching to Dynamic Microphones
The real turning point came when my friend Louis, who is an audio engineer, loaned me a Shure SM57. This was my first experience with a dynamic microphone. The difference was night and day.
Dynamic mics are less sensitive than condenser mics. They focus on your voice and reject most background noise. For podcasting, that’s exactly what you want.
I also learned about pop filters. Without one, the microphone picked up harsh “P” and “B” sounds that ruined the recording. With a simple filter in front of the mic, those plosives disappeared. It was such a small thing, but it made the audio so much more professional.
Mic placement mattered too. I used to sit far away, thinking it didn’t matter. But with dynamic mics, you need to stay close—about a fist away from your mouth. Small adjustments like this added up.
Later, I upgraded again to the Shure MV7, which had a built-in pop filter and gave me even better sound. By then, I knew one thing for sure: the number one piece of advice for new podcasters is this—get a dynamic microphone.
Read more about microphones: The Best Podcast Microphones For Any Budget In 2025
Adding a Mixer or Interface
Once I switched to XLR mics, I needed a way to connect them to my computer. That’s when I bought the Zoom PodTrak P4. It was simple, affordable, and powerful.
The PodTrak P4 gave me four XLR inputs, so I could record multiple guests. I could control the gain for each mic and record directly onto an SD card. It felt like a real upgrade from just plugging a mic into a laptop.
There are more expensive mixers out there, like the RØDECaster Pro, but the PodTrak P4 did everything I needed. If you’re starting out, I’d say go with a USB dynamic mic. But if you want to grow into XLR microphones, you’ll need a mixer or interface.
Editing Software: From GarageBand to Descript
When I started, I edited in GarageBand because it was free. I had no idea what I was doing. I pressed buttons, tried EQ settings, and hoped it sounded better. Editing took hours, and I never felt confident about the results.
Then I discovered Descript. That changed everything.
Descript lets me edit audio like text. I could delete words in the transcript, and the audio cut automatically. It was faster and easier than anything I’d used before. But the real magic was a feature called Studio Sound.
Studio Sound used AI to clean up recordings. It removed background noise, balanced voices, and made the audio clearer. For the first time, my podcast sounded professional without hours of editing. It wasn’t perfect—sometimes it cut out laughter or softened the end of sentences—but it was still a massive leap forward.
Yes, Descript costs around $20 a month, but to me, it was worth every dollar.
Video Podcasting & Lighting
For a long time, I resisted video. I liked that podcasting was audio-only. I could hide behind the mic, record in my bedroom, and not worry about how I looked.
But video became impossible to ignore. Audiences wanted clips for social media. YouTube became a big channel for podcasts. So I gave it a try.
My first videos were awful—grainy 720p webcam, bad angles, and no lighting. Eventually, I learned I could use my phone as a webcam. That looked so much better. Later, I invested in Sony A6400 cameras and GoDox lights for the studio.
What I learned about lighting was simple: natural light is best. If you don’t have it, use lights but make sure to add contrast. Don’t just shine a bright light on your face. Give it some depth with shadows.
If you’re new, don’t wait to buy fancy cameras. Just use your phone and start recording.

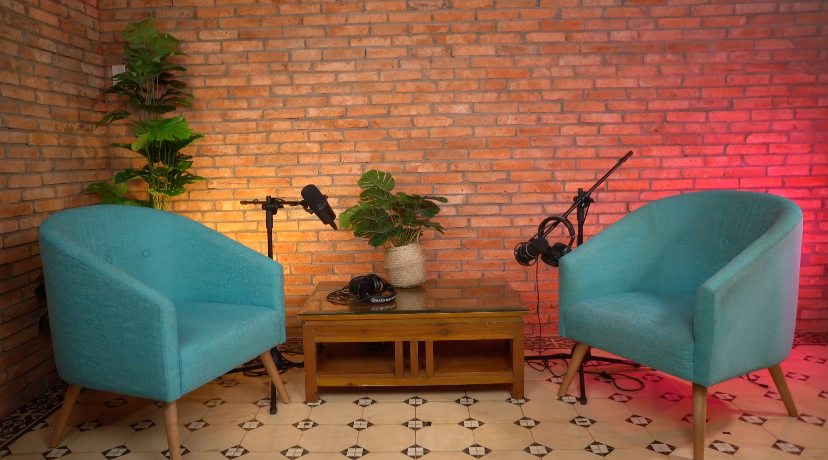
If you don’t know how to set the mic or adjust the light, simply choose to hire a studio. At Saigon Studio Podcast, we have everything ready for you.
Soundproofing vs. Sound Treatment
Another myth I believed early on was that you needed expensive soundproofing. I covered walls with pillows, blankets, and foam panels. Honestly, it barely made a difference.
What made the real difference was using a good dynamic mic and Descript. That solved 90% of my problems.
If you want to improve your sound, focus on simple fixes:
- Record in a smaller room.
- Avoid shiny surfaces like tiles or glass.
- Add a rug or curtain if you can.
That’s enough for most podcasters. Unless you’re building a professional studio, you don’t need thousands of dollars in acoustic panels.
The Right Mindset for Podcast Equipment
The biggest lesson I learned over the years is this: don’t let equipment stop you from starting.
So many people tell me they want to podcast, but they’re waiting until they can buy the “right gear.” They think they need a $500 mic, a $500 camera, and professional lights before they can begin. That’s not true.
When I started, I had one mic and a laptop. It wasn’t great, but it got me going. Every upgrade I made came later, step by step.
I’ve always tried to follow a simple rule: just get 1% better each time. That might mean moving the mic closer, learning a new editing trick, or buying one new piece of equipment. Over time, those small improvements added up to big results.
Conclusion
My journey with podcast equipment started messy—with a Blue Yeti, a noisy room, and a lot of frustration. But each step taught me something. Switching to dynamic microphones cleaned up my sound. Adding a mixer gave me control. Descript made editing easier. Video and lighting opened new doors.
I didn’t upgrade all at once. I did it slowly, always looking for that next 1% improvement.


